The Cottage Problem
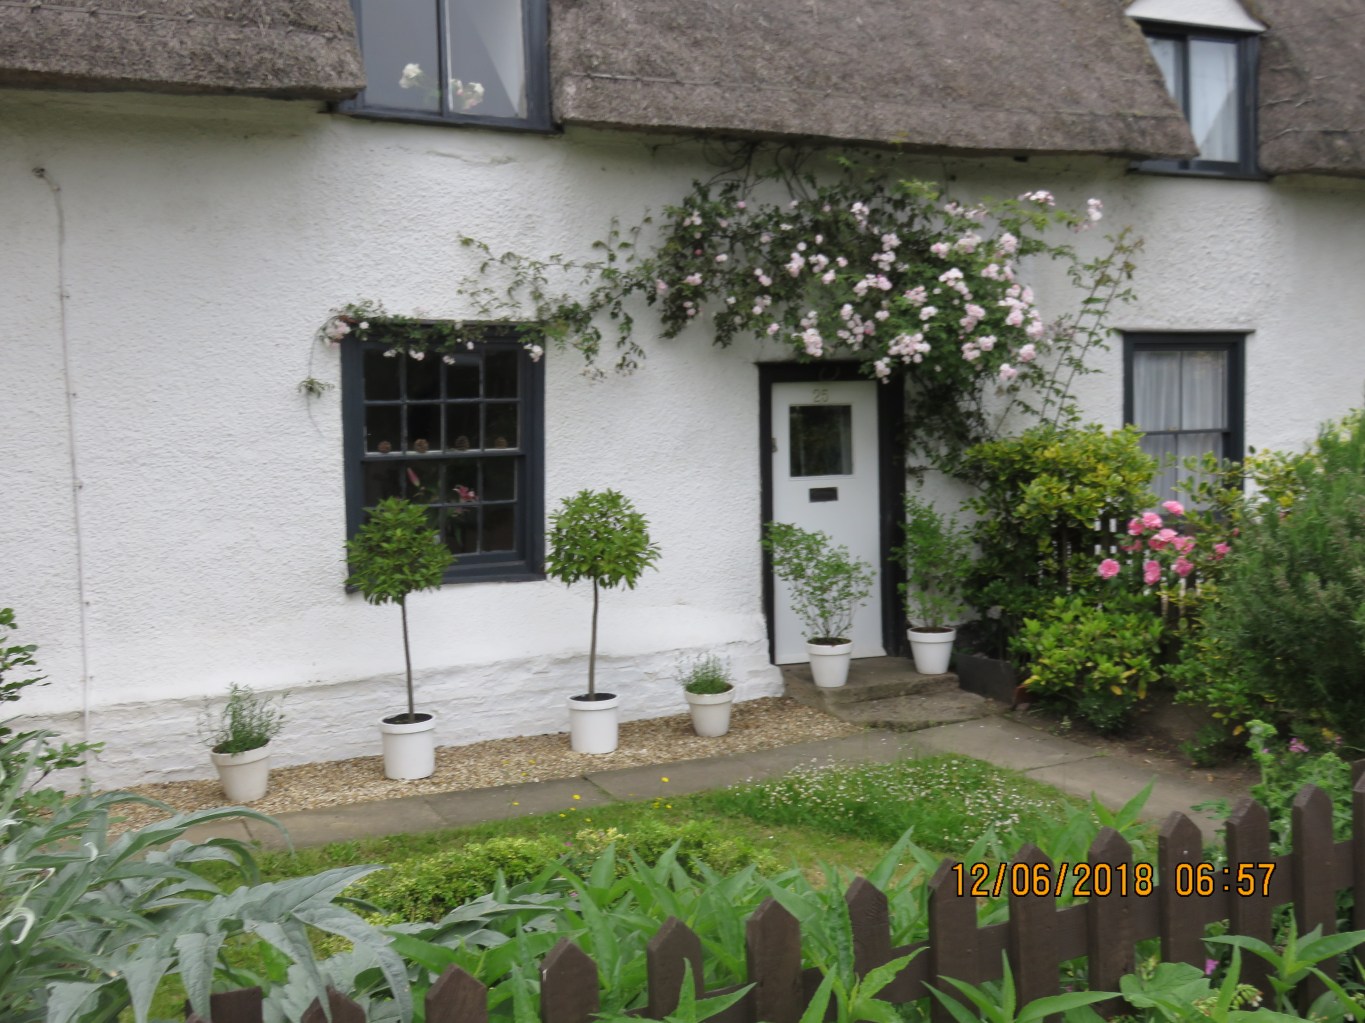
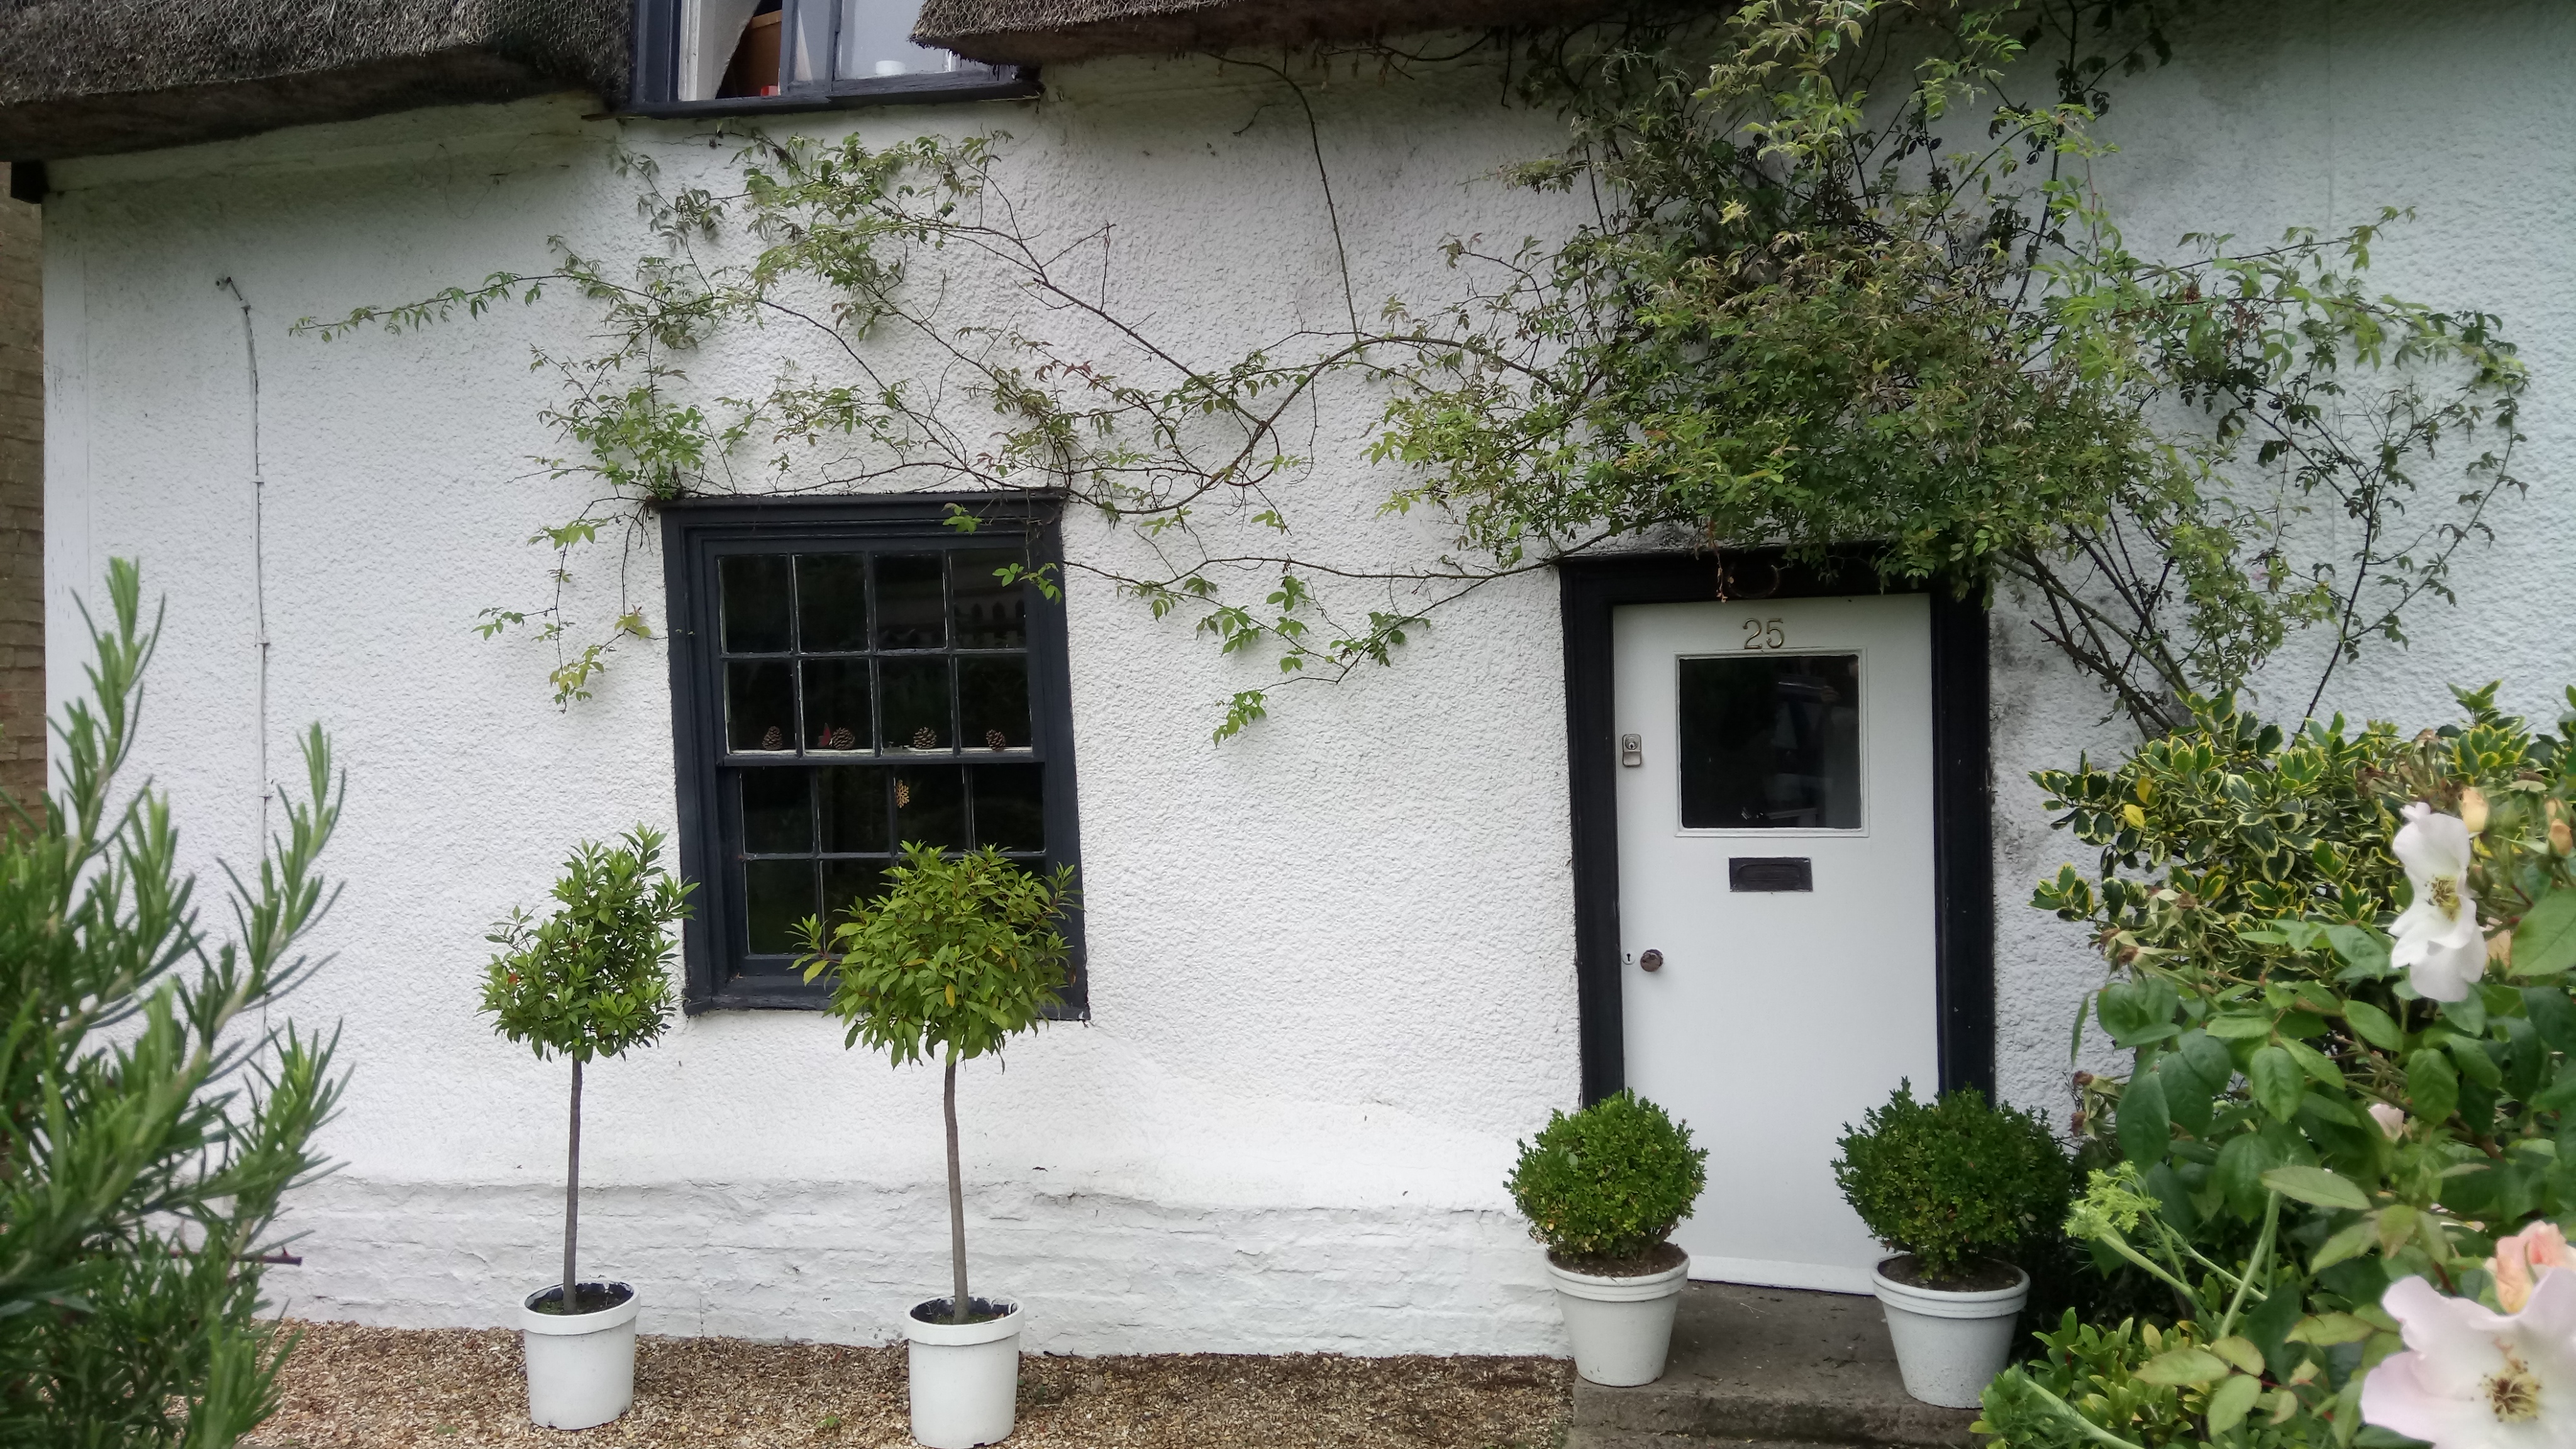
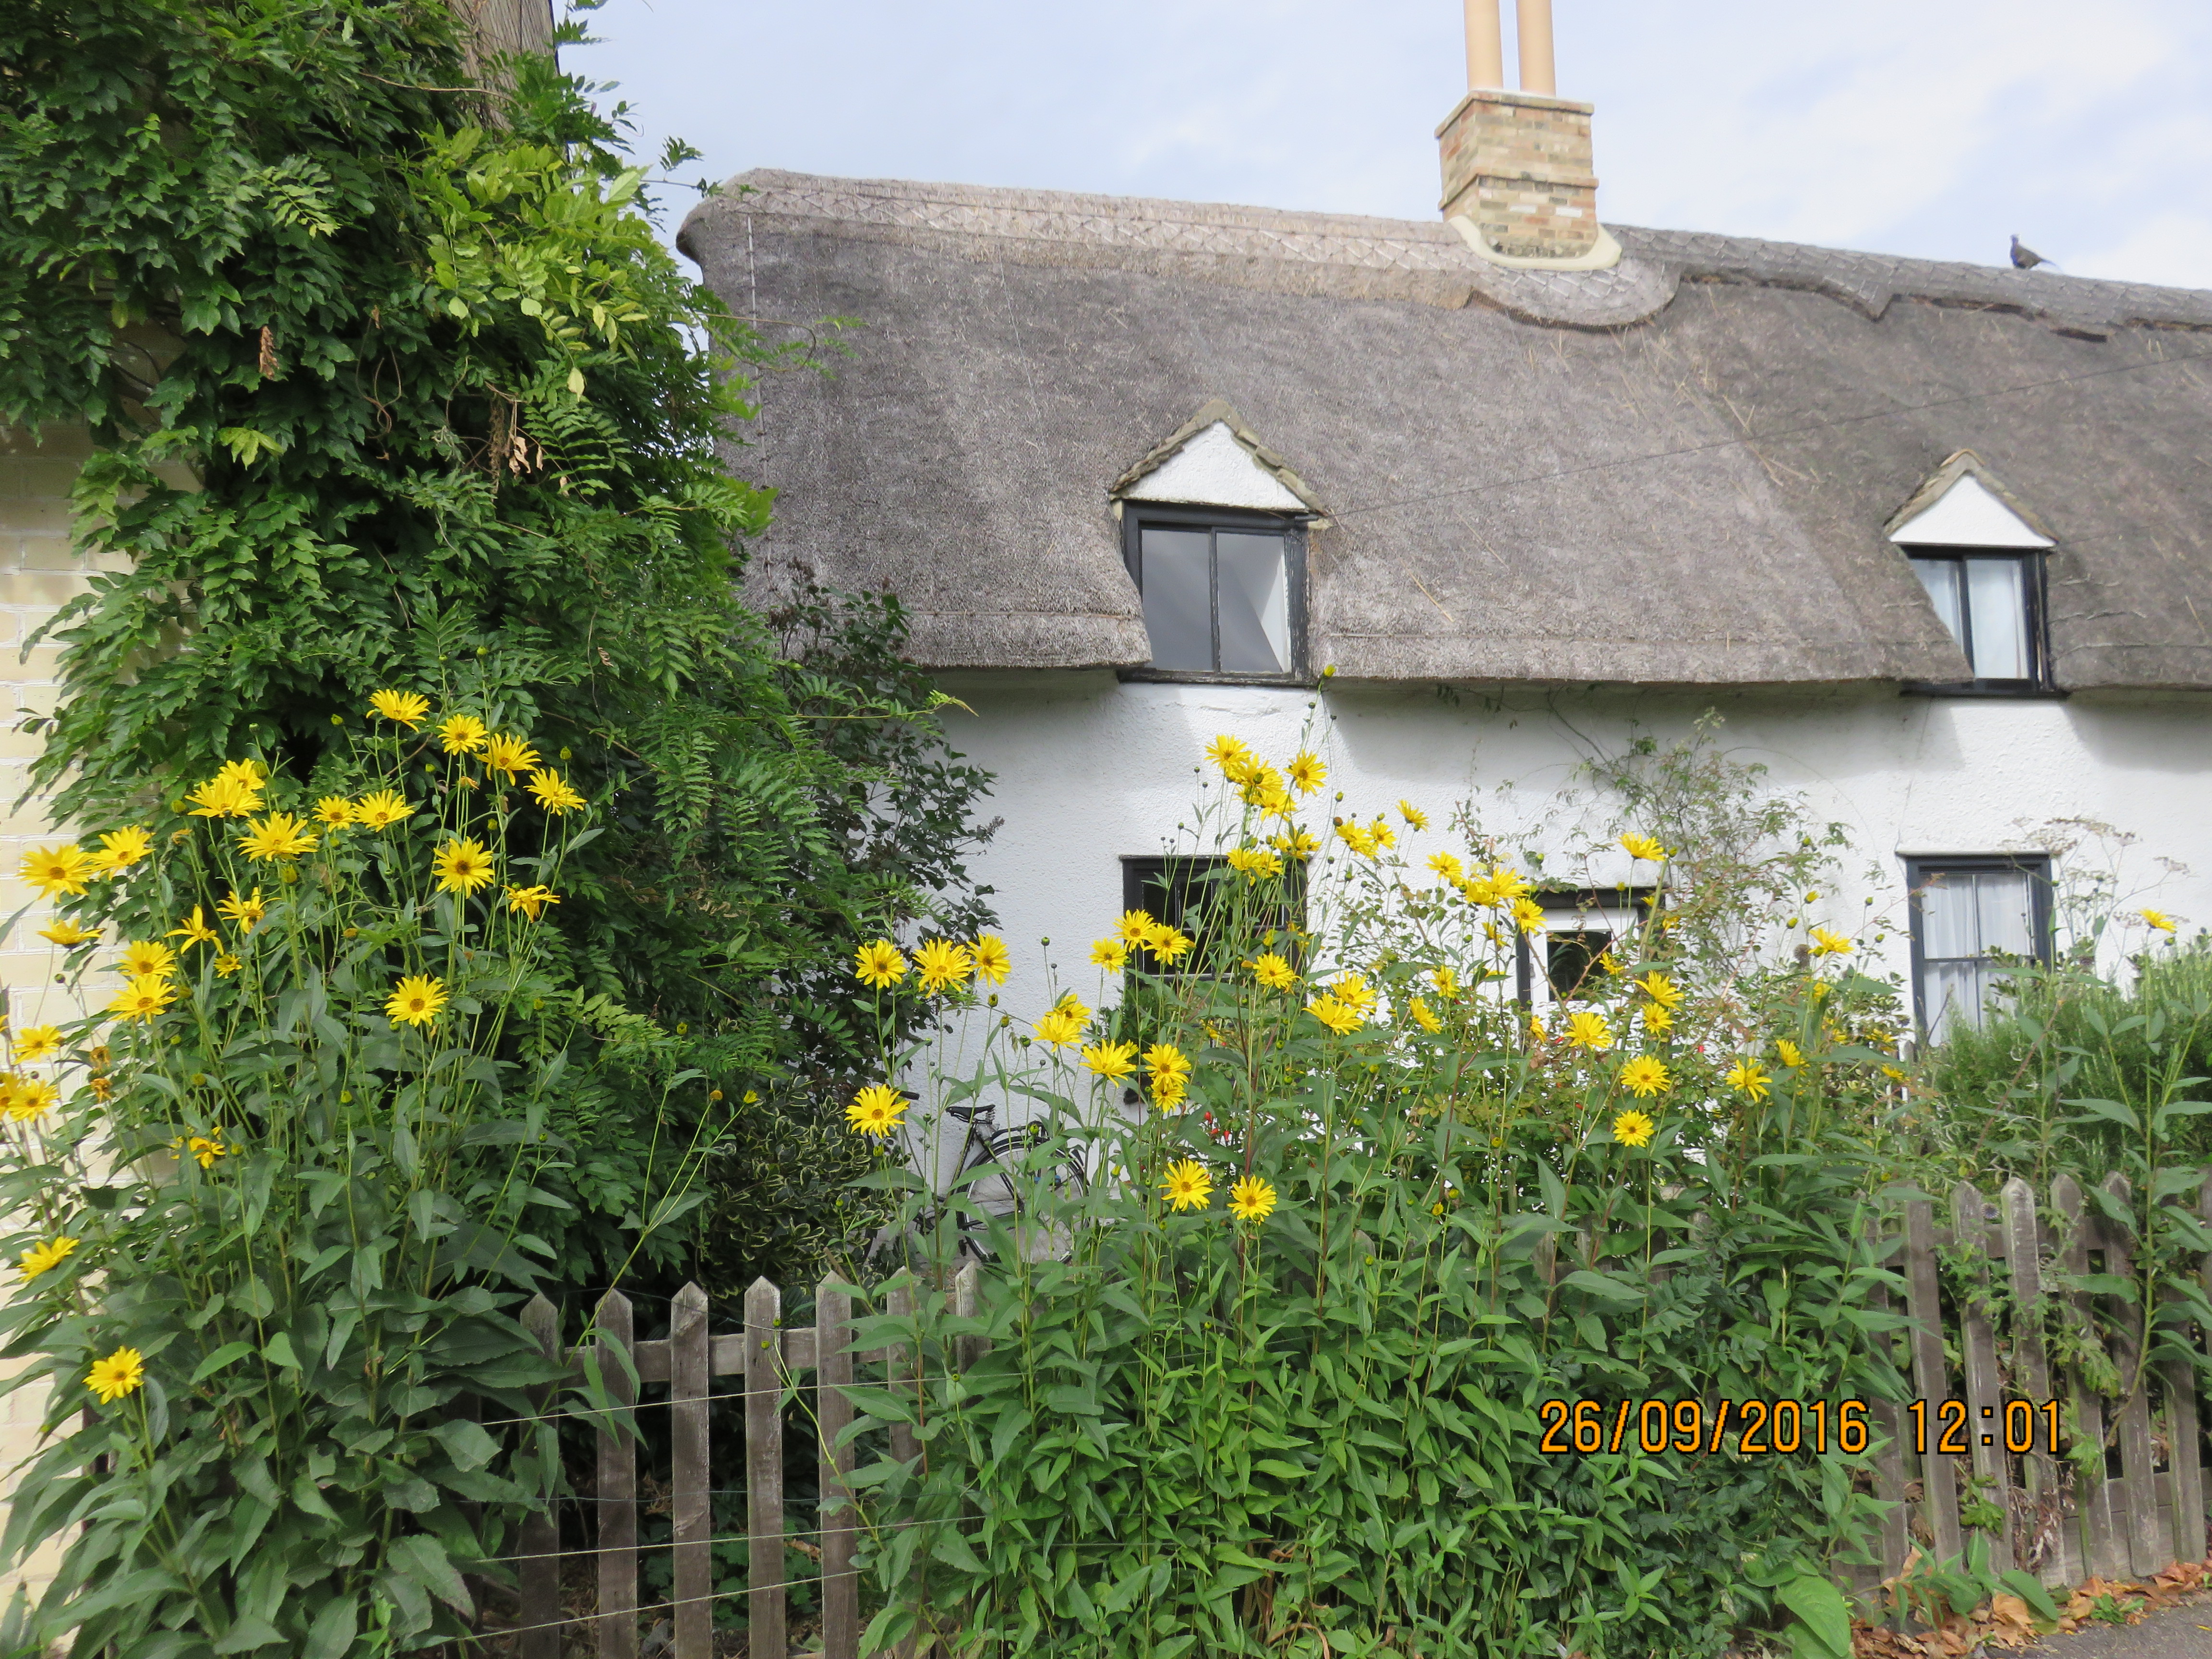
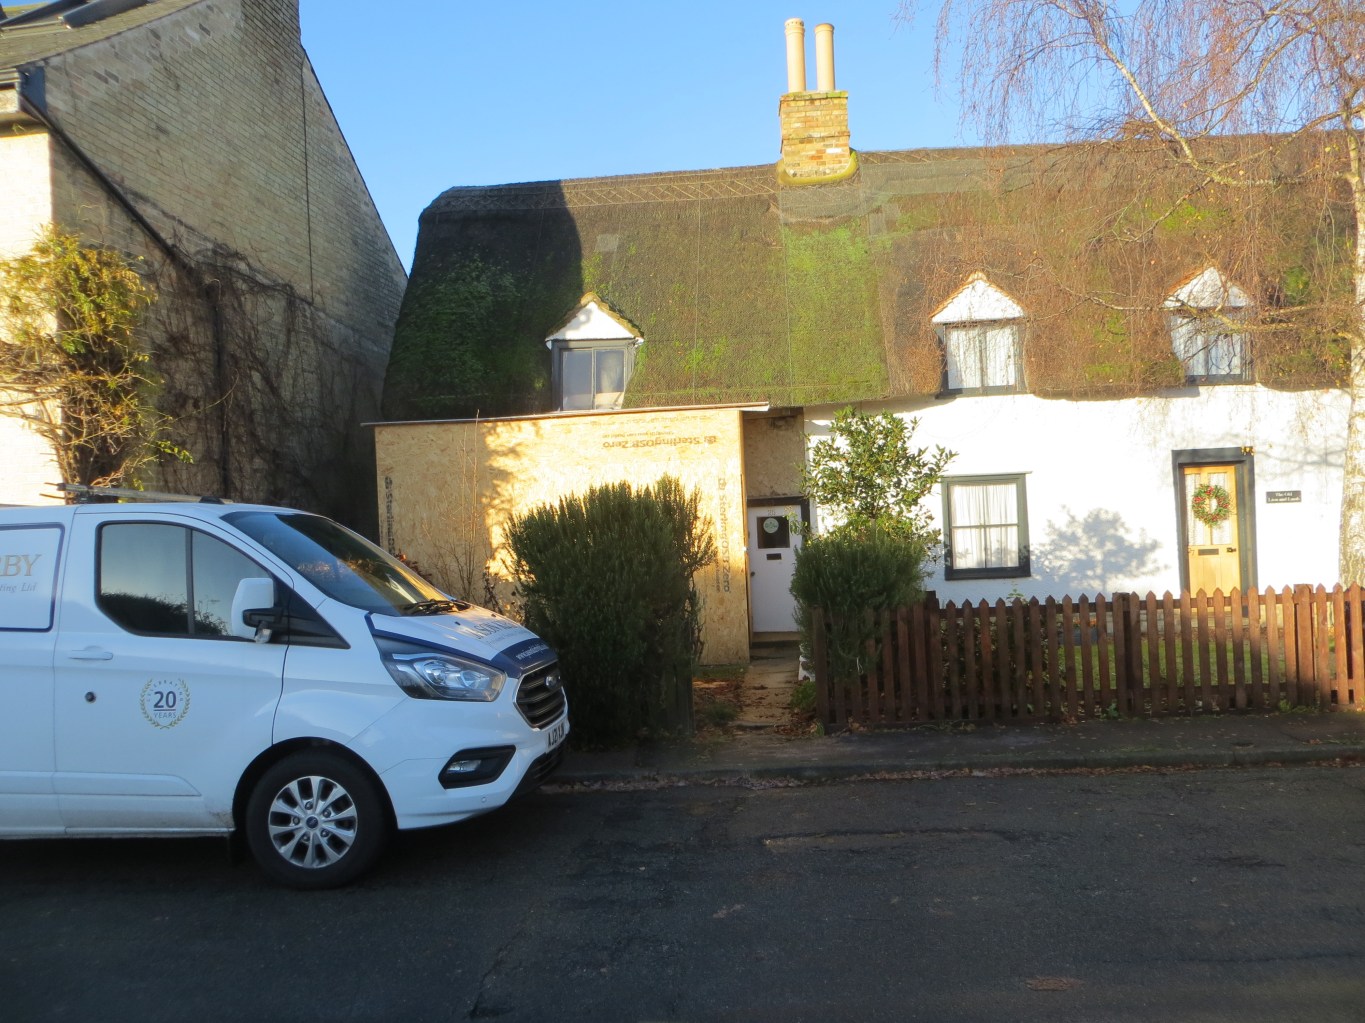
The front wall of our cottage leans out from just above the top of the plinth to the wall plate. Overall about 10 – 11 degree lean in the wall between the window and the door. Its a timber frame – ‘H’ frame – with wattle and daub infills. Its a listed building. Suggest you scroll through the pictures included below to see the problem.

Been living here for 10 years now and the front wall is in the pretty much same state as when we moved in, but some more cracks have appeared over the last winter in the concrete(!) render applied by previous owners. Its not possible to tell if its just the render or more … but as you will see from the lean of the wall and window we cant take the risk of just leaving it. When purchasing surveyors said it was stable though fragile and leave as is often the best policy in these situation where such buildings can cope with such lean for centuries. But recent inspection by engineer reports we should strap to restrain roof spread, find and fix failed timbers and implement some permanent additional support v roof spread, asap as any more inches of spread would be v bad. Engineer also identified decayed wall plate immediately under upstairs window as in need of replcement.
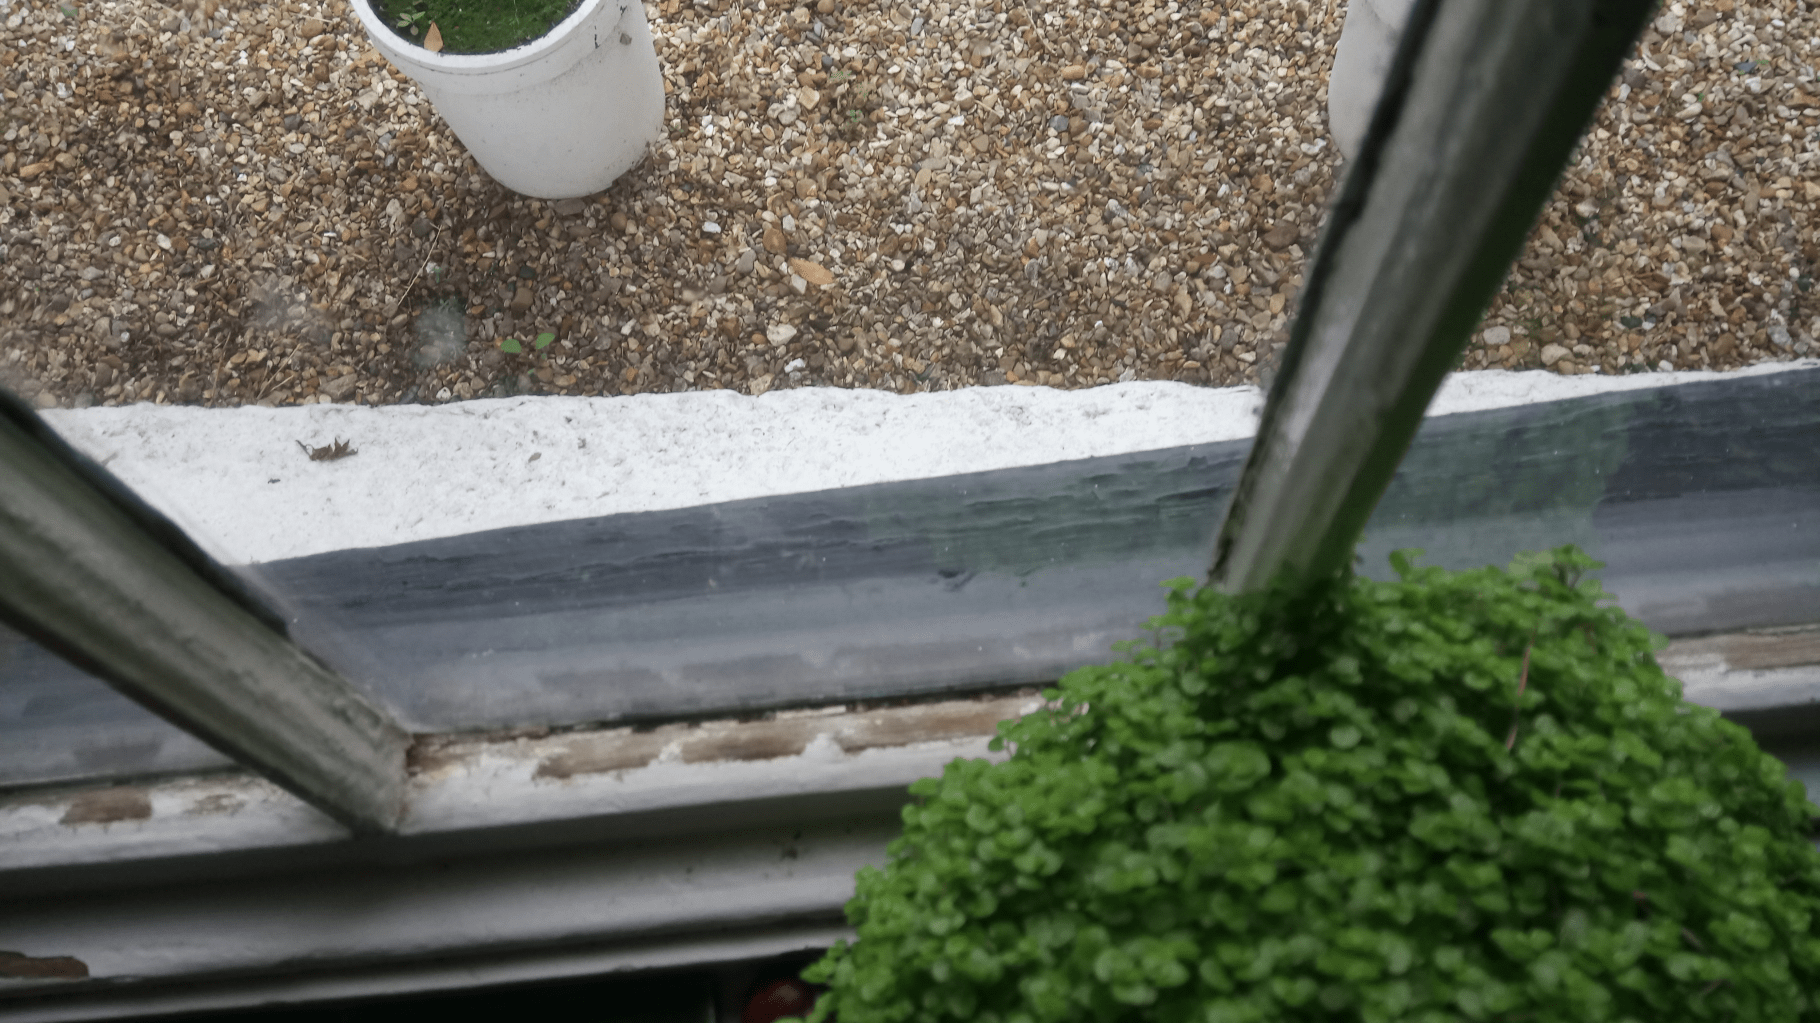
Its not an even lean across the whole front: the right hand side of the window frame is the epi centre of the move – on the inside of the wall at this point, just above the plinth the wall has been broken (see pics above and below) . The wall looks quite normal on the left of the window but from there moves inward from the base to most recessed at the right hand side of the window and then moves back into line at the left of the door. / \
At the most the wall is at maybe 11 degrees as a result. It looks to me like the post has broken near the brick plinth and when I removed some of the internal plaster several years ago, I could see some work was done on the sole plate including use of flitch plate. The plate looks like it has sharp edges to me and if a post were inserted into it, which judging by its position I would expect it must be, could see that it would snap a post on which a leaning force was applied. Alternatively a rafter has come loose from ridge and caused connected post to move out at top and in at bottom. Alternatively the very heavy window frame has caused the post to fail/break. Finally sole plate might be rotten and cause for of post to dislodge and ‘float’. Which of all of these would be cause v effect is debateable but the Engineer reports that the structure or the building isn’t effective v roof spread forces: the collar tie is too high. We considered knee bracing each stud but the 1st floor joists are under spec at only 5 inches and replacing them all with say 8 inch rafter would be a lot of work/impact on heritage timbers as floor and ceiling would need to repositioned too.
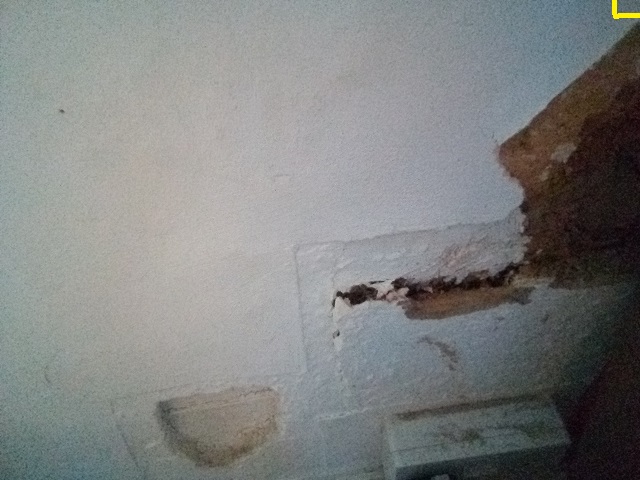
The yellow line indicates bottom corner of ground floor window.


This view taken from the inside show how far the window frame and plinth have parted ways on the left of the frame (from the inside).

Proposed Solution … …
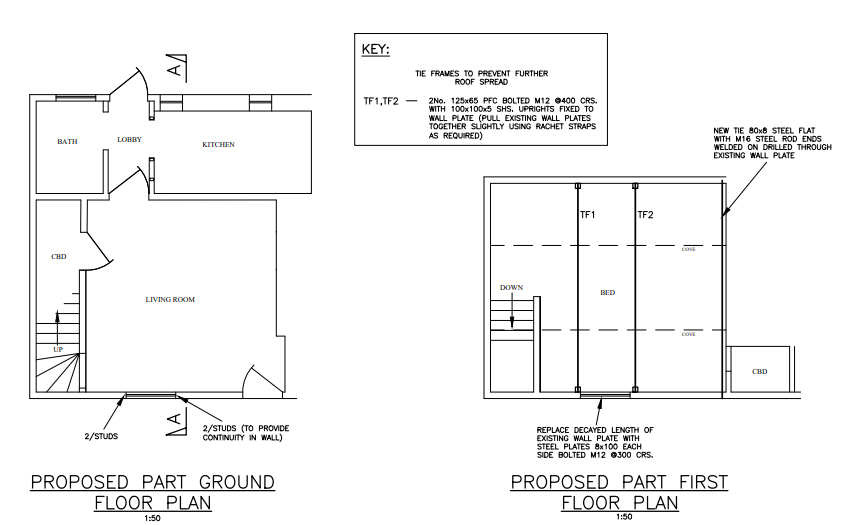
Obviously the wall (wattle and daub) needs to be stripped to see exactly what has failed and repair. But the engineer points to roof spread as the underlying cause of the problem, due to poor original design, and has recommended we add additional support against further roof-spread as the tie collar is in the top 3rd of the roof and its an H frame building – so roof spread inevitable fm the design. This seems an elegant solution – wall plate at front is connected to wall plate at back by a tie frame running alongside the floorboards but with raised arms at either end to meet the wall plate (H frame). The engineer also suggest another tie beam on the party wall.
So as well as stripping down all the infills (for reuse of course), replacing and repositioning any defective timbers we will need a steel fabricator to make and help place the metal tie frames.
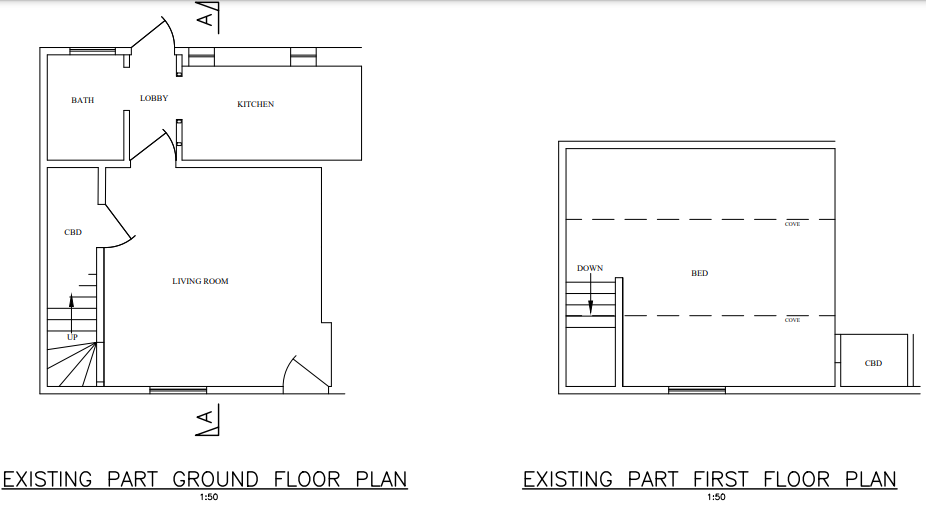
Here are some diagrams showing the cottage and then the proposed additional ties.


Plan of Attack
The initial tranche of work i am talking with the conservation officer about is to strap the walls to prevent further roof spread ASAP. This involves connecting the front wall plate and rear wall plate with 5 tonne straps and then supporting the front wall plate with props. To do this I will need to remove (and store for reuse) some internal plastering to see the structure of the wall plate and supporting studs (in order to place straps and props safely (so not putting a hole through a post or strapping a 3 inch minor support instead of the 5 + inch studs!).
Once we have strapped and supported the walls temporarily we will need to convert and extend garden sheds to give some temporary accomodation as well as additional storage that we can camp in when we embark on the repair work.
Once we have that we can remove the wattle and daub infills fm the front wall as well as some of the ceilings around the collar tie, inspect the timer frame in detail to see what has actually failed and why, repair posts/braces/rafters as necessary and, assuming planning permission is given, install some 3 new metal ties to help the wall plates resist rood spread going forward. I hope to employ professionals to do the structural timber work but plan to do the wattle and daub infill work, both stripping down and then redoing once structural work complete (been on Orchard Barn courses for wattle and daub and timber framing).

Repair Phase 1 – Strip, Examine and Prop
We removed the render from the leaning wall: its was 2 inch thick concrete. Concrete is well known to damage timber because it holds onto moisture and keeps timbers damp which over years turns them black and decayed. Removing the render enables you to see the timber structure as the way most building like this are done is to have the outside surface of the wall just covering the timbers a little (whereas inside, a much greater depth of plaster before you get to the timbers).
What do we see?
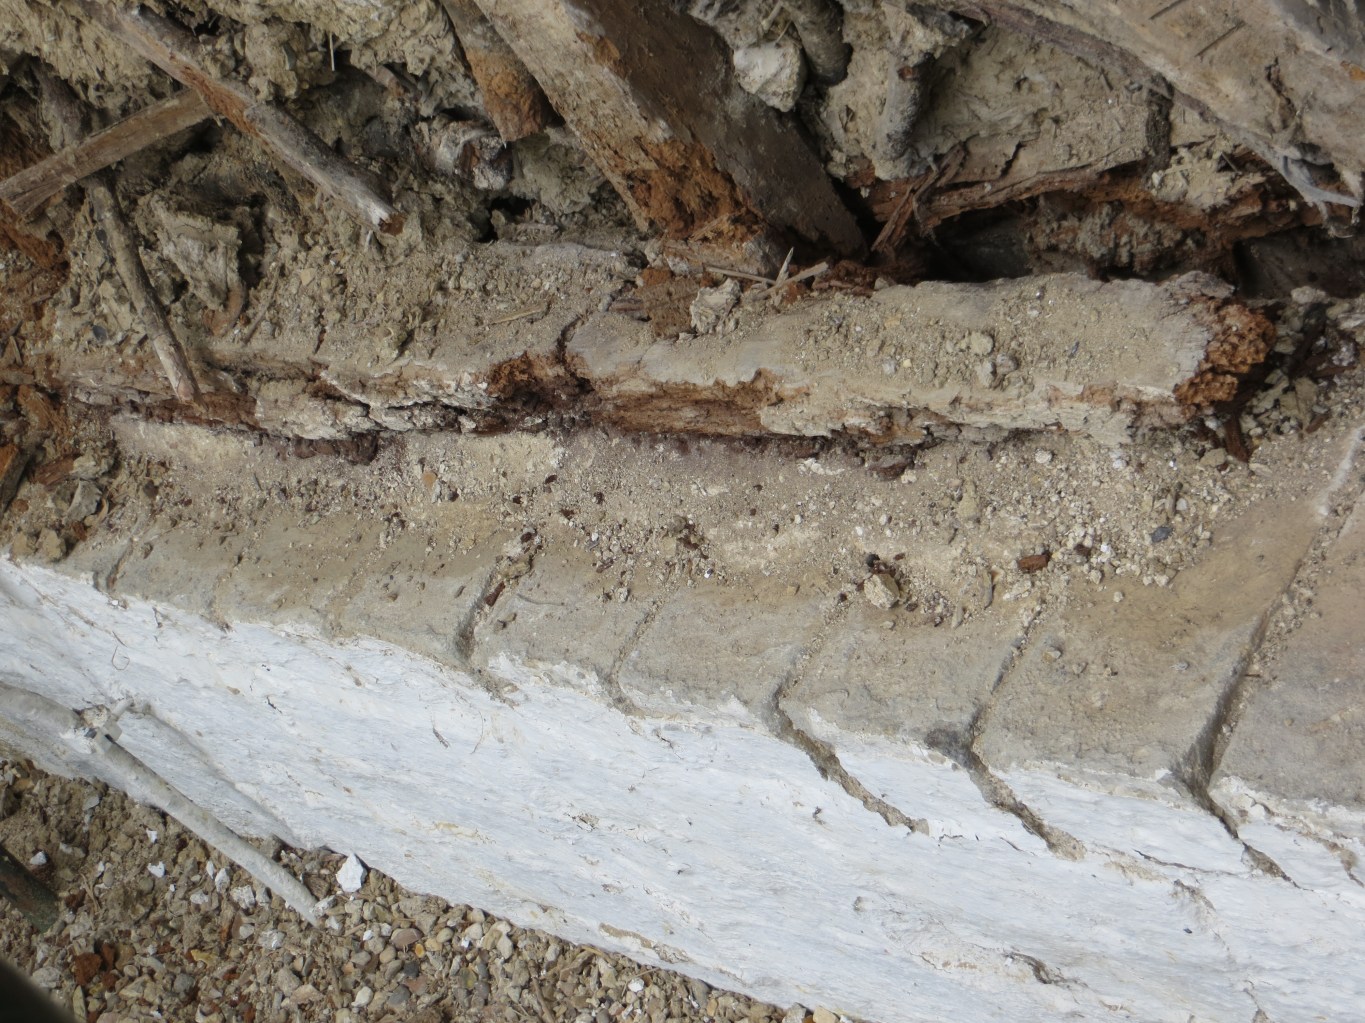
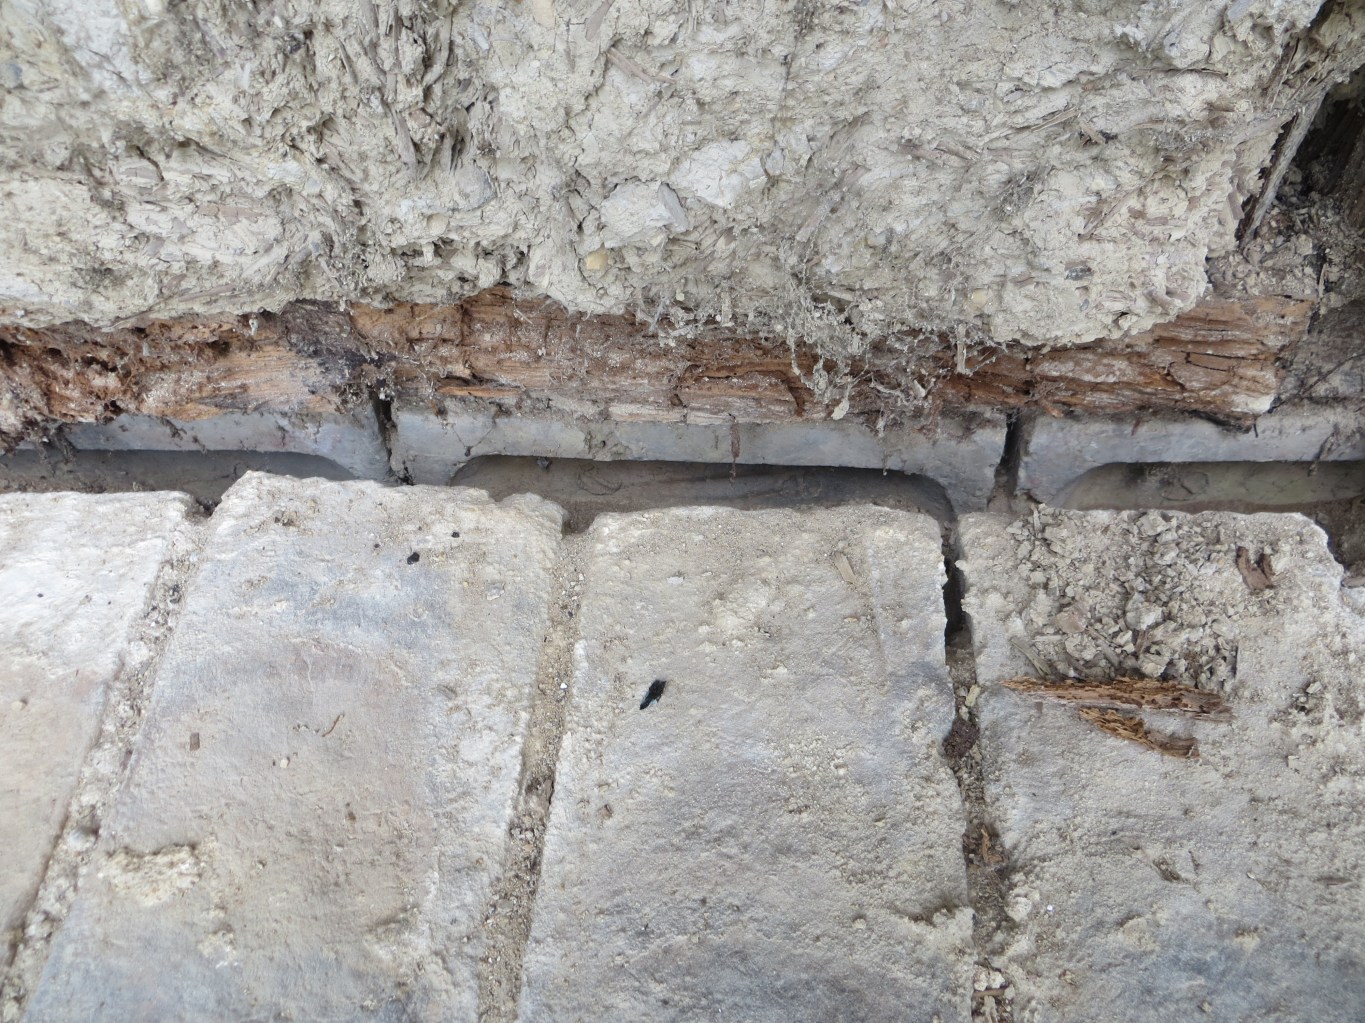
Sole Plate
The sole plate which is the big beam of wood that goes across the building at its foot and in which the posts which make the walls and hold up the roof sit, was virtually non existent: rotted away to almost nothing, you can just see some remains of it on the left and right back in under the posts. The posts have almost no base to sit in just the very back bit of the sole plate which is resting on the 2nd grey brick plinth put behind the original you can see, but is crumbly not solid, so they look like are are ‘hanging’.
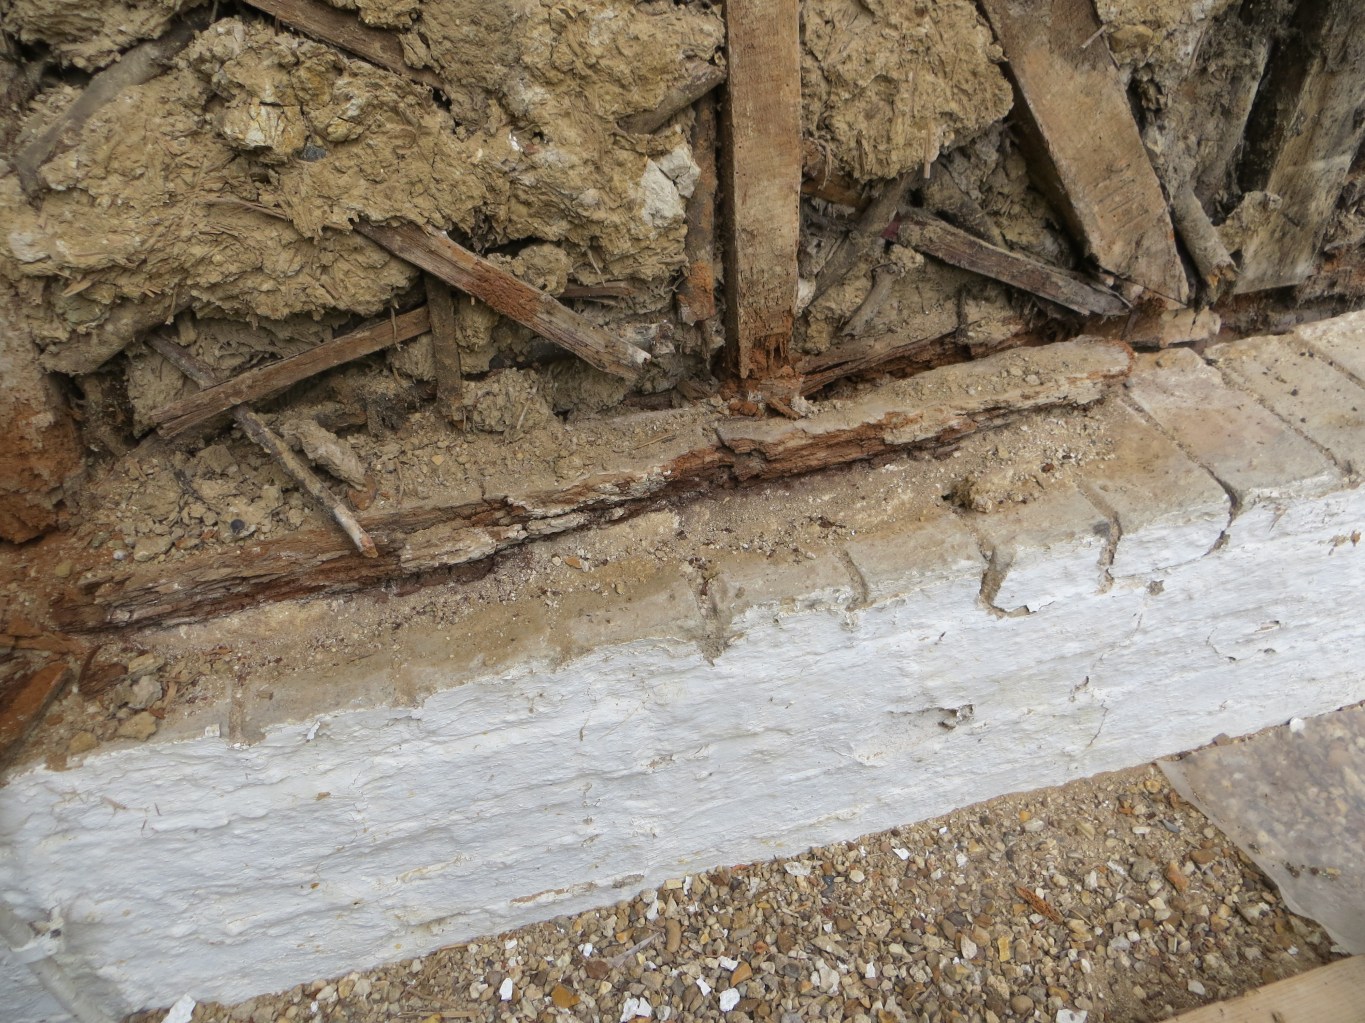
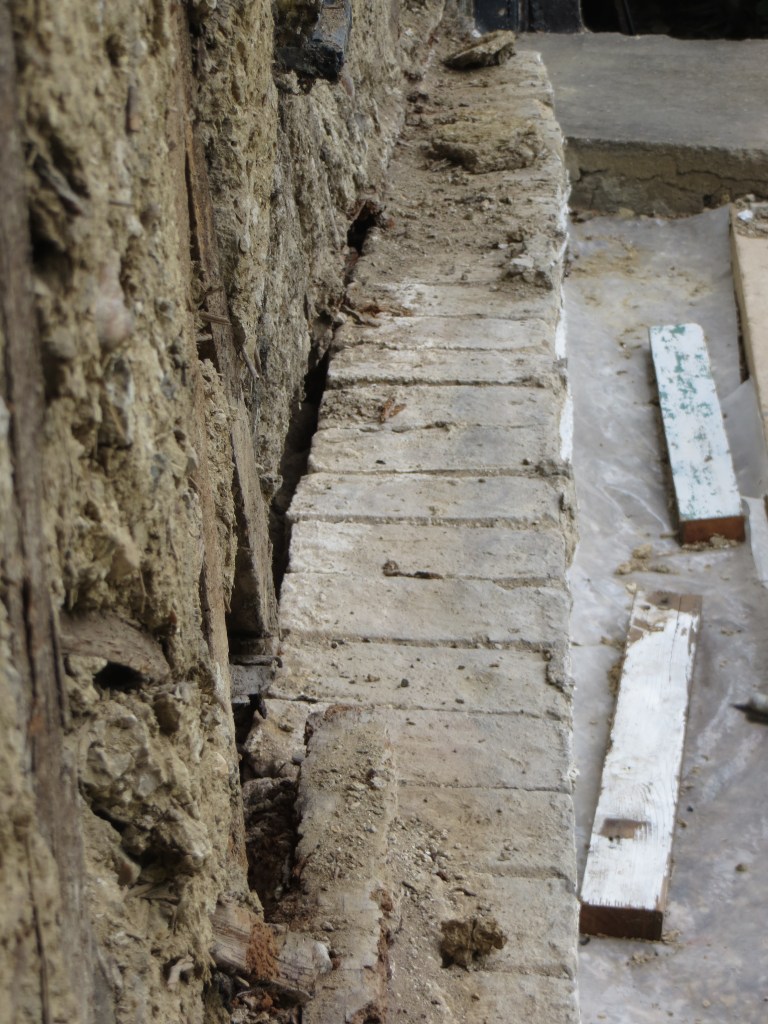
The bits that remain show clearly it had moved back from its original position (which would mean posts fitted into it went straight up) by about 10 inches so that it in the middle area under the window it was off the brick plinth meant to support it. A some point in the not too distant past someone had installed another row of bricks to support it – very modern grey bricks – ignoring the angle the move was leaving the posts in and not doing anything to prevent further movement – indeed covering over with cement to hide the horrible truth – a sole plate decaying and moving inwards reducing the support the posts giving to the roof and walls.
Also on this additional modern plinth It looks like they added (nailing on) some cross timbers (on the internal side of the wall) to support the first floor joists which were in danger of collapsing because the main/original frame at the top of the wall was leaning outwards (leaning inwards at the bottom) and hence the timbers on which the joists were resting were moving away from them. Joists resting on such flimsy support is rather worrying.
Spindly Posts
A couple of the posts are 4 x 4 inches wide but several are smaller like 3 x 3.5 and look way too thin – in particular the one at the immediate right of the window frame – the centre of the bowing – has broken toward the bottom.
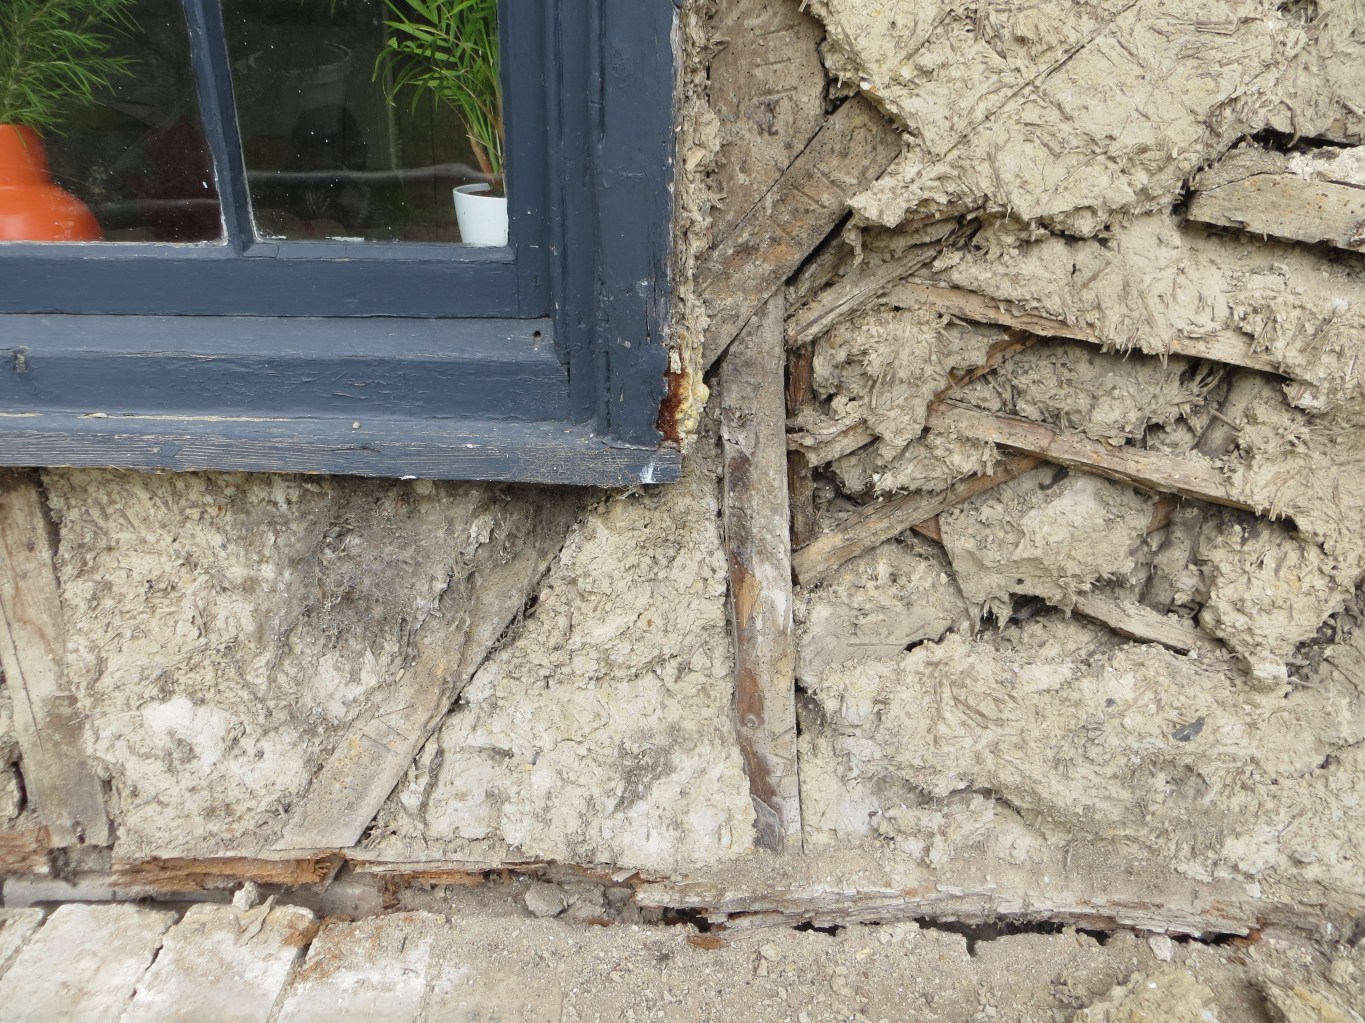
Cut and Broken Braces
Another reason for that failure could be that a brace (a timber placed diagonally across several posts to stop a building moving sideways ( / or \ ) has been cut in half in order to allow room for the window frame – probably added at a later date than original build. Its at the point where this cut brace and this very slender post meet that the wall has caved in a bit and the leaning wall and all the other bits follow this a little – the epi centre of the failure. (Although roof spread creates the force to push top of walls out and hence bottom of walls in, good timbers can resist this for some time but- a weak / weakened timbers succumb.)
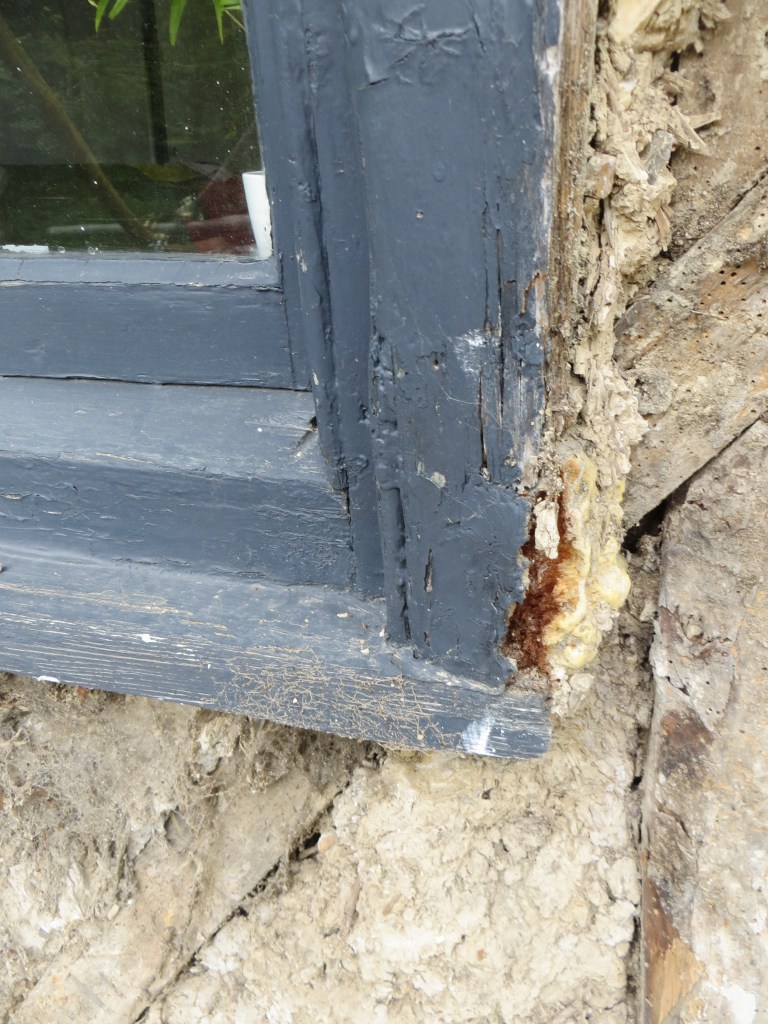
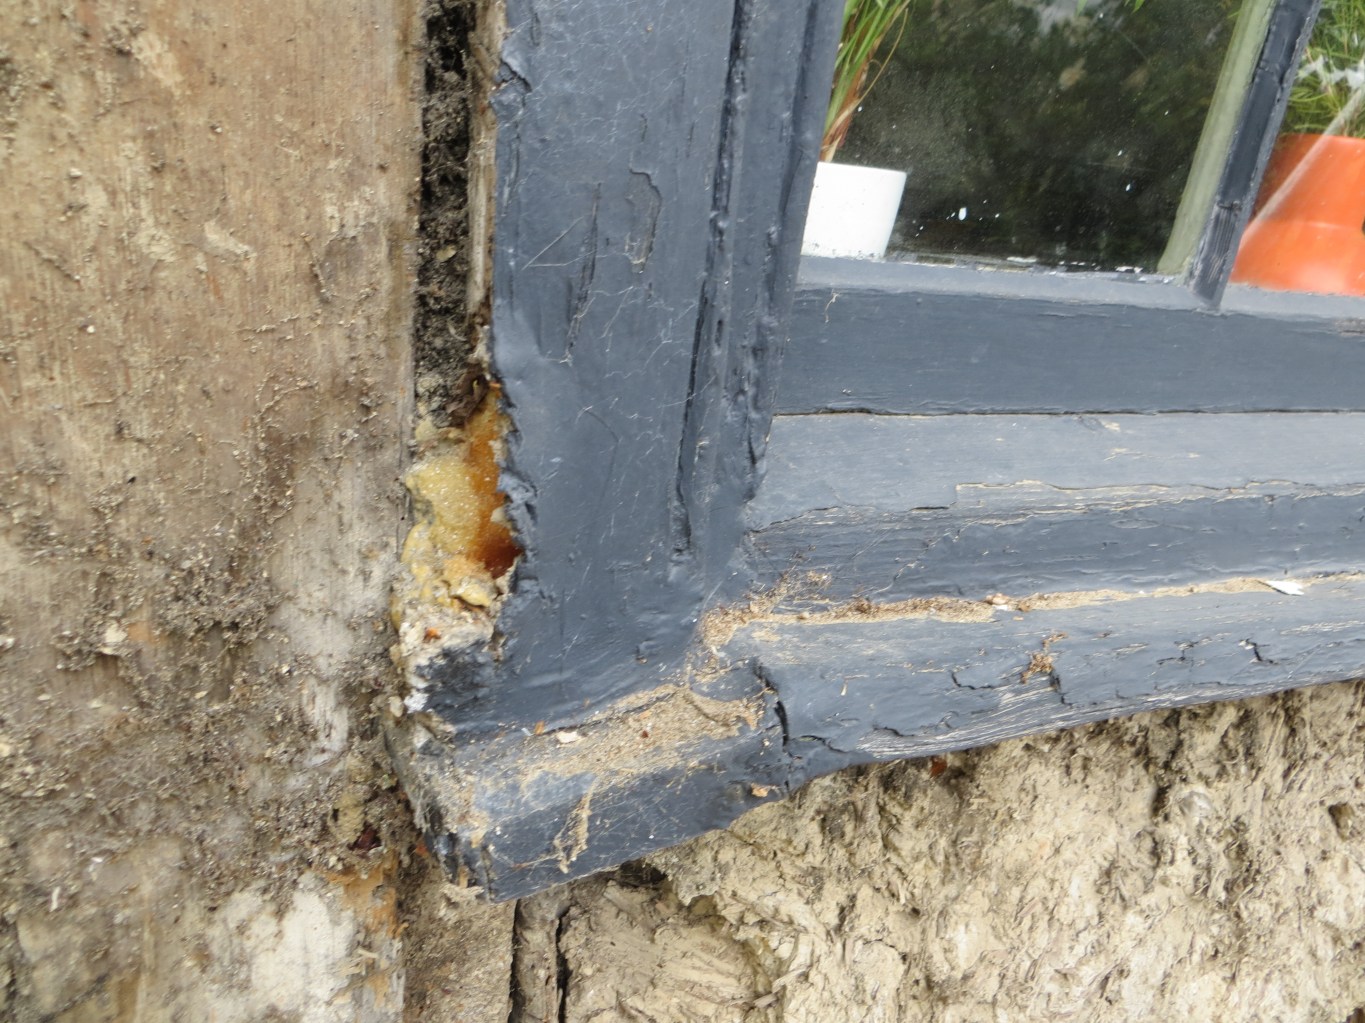
Yorkshire windows problem
The top of the post to the immediate right of the dormer window is completely black and decayed as is the wall plate immediately beneath it. The window was poorly put together and rainwater came in sitting on the sill which had a slight incline to the right because of the broken post described above. This water went through the sill to the top of the posts and plate for many years. It was only a couple of years ago I discovered this problem – a poorly fitted bead meant the two sliding parts of the window had a small gap which windy rain came through. But it had been like that for many years, damage done. And the wet timers held onto moisture as encased in concrete.

Olde Plinth not Straight
The little wall on which the timber front wall was built is not actually at perfect right angle to the side walls of the cottage but comes a little further out at the left of the cottage (loo2king from the outside) when compared with where the door is. Not sure if this would cause an issue but it may have meant that wall posts near the door side of the cottage where already leaning outward when it was built. Engineer advice on this and if to align it properly worthwhile.

Olde window casement decayed
Naturally facing the weather and with all the moisture about it, has a broken sill and sides – not sure if it will be safe to use going forward but once we get it off the wall we can strip it down and inspect with hope of repairing it OK.
Roof spread
A plumb line suspended from the front of the wall plate indicates that some sections of the wall, mainly in the middle area and toward the door, are about 2 inches further out than the front of the olde plinth. However if the plinth was straight (at right angles to side wall) it might be just about aligned – except for the bit immediately below the dormer where you’d expect the result of roof spread force to be greatest – especially with such flimsy right post, heavy window frame and cut brace …. Adding several additional ties to keep wall plates front and back together and preventing further spread, as recommended by the Engineer we consulted, seems like a no brainer … otherwise repairs not likely to increase longevity of habitable building.
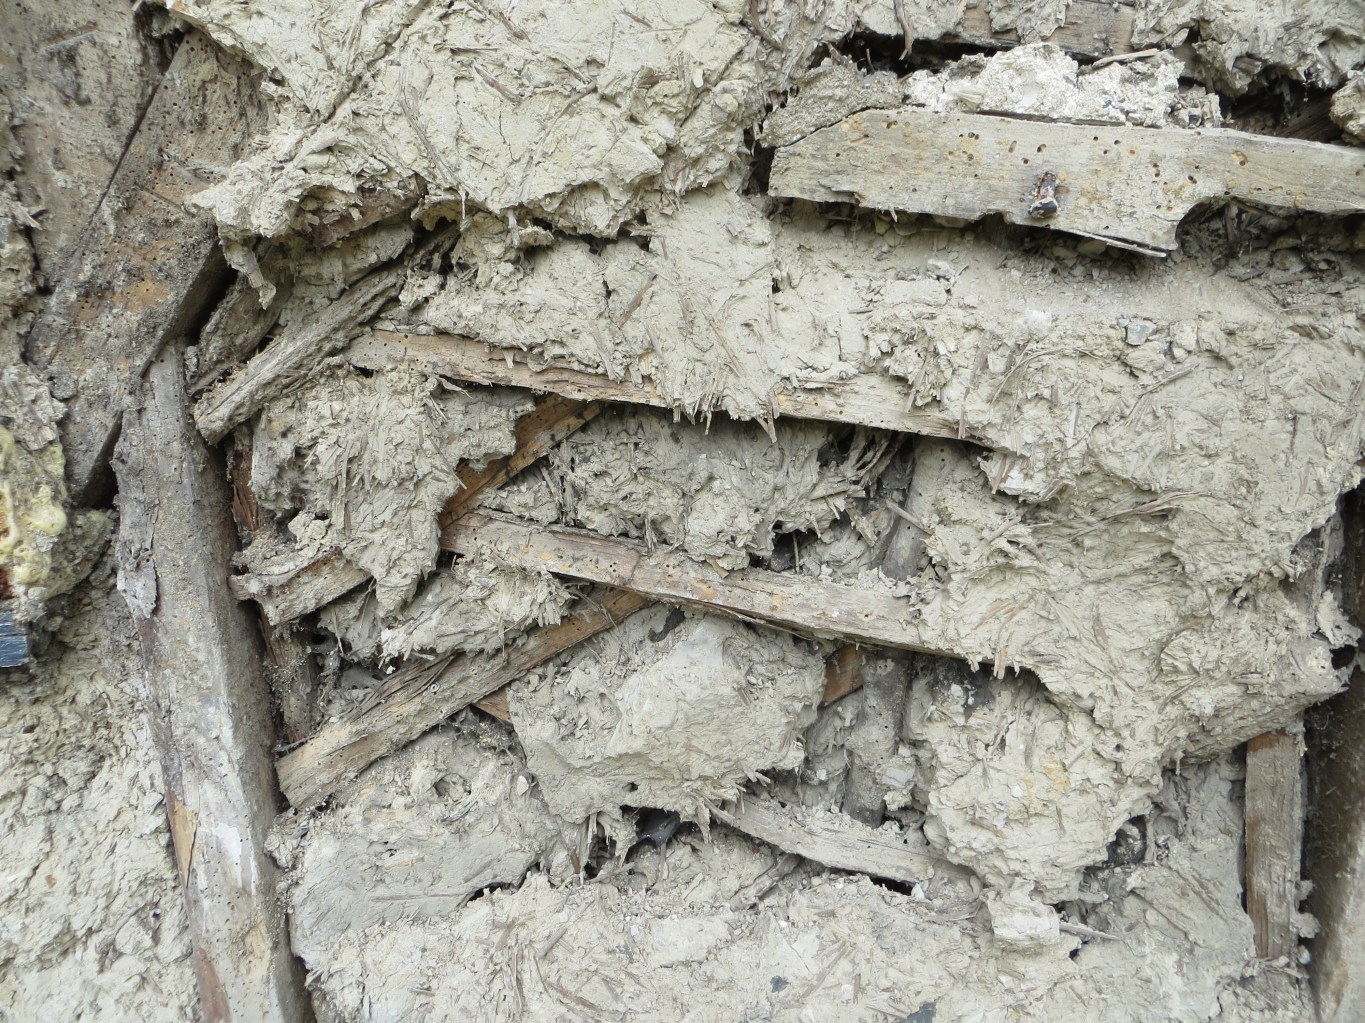
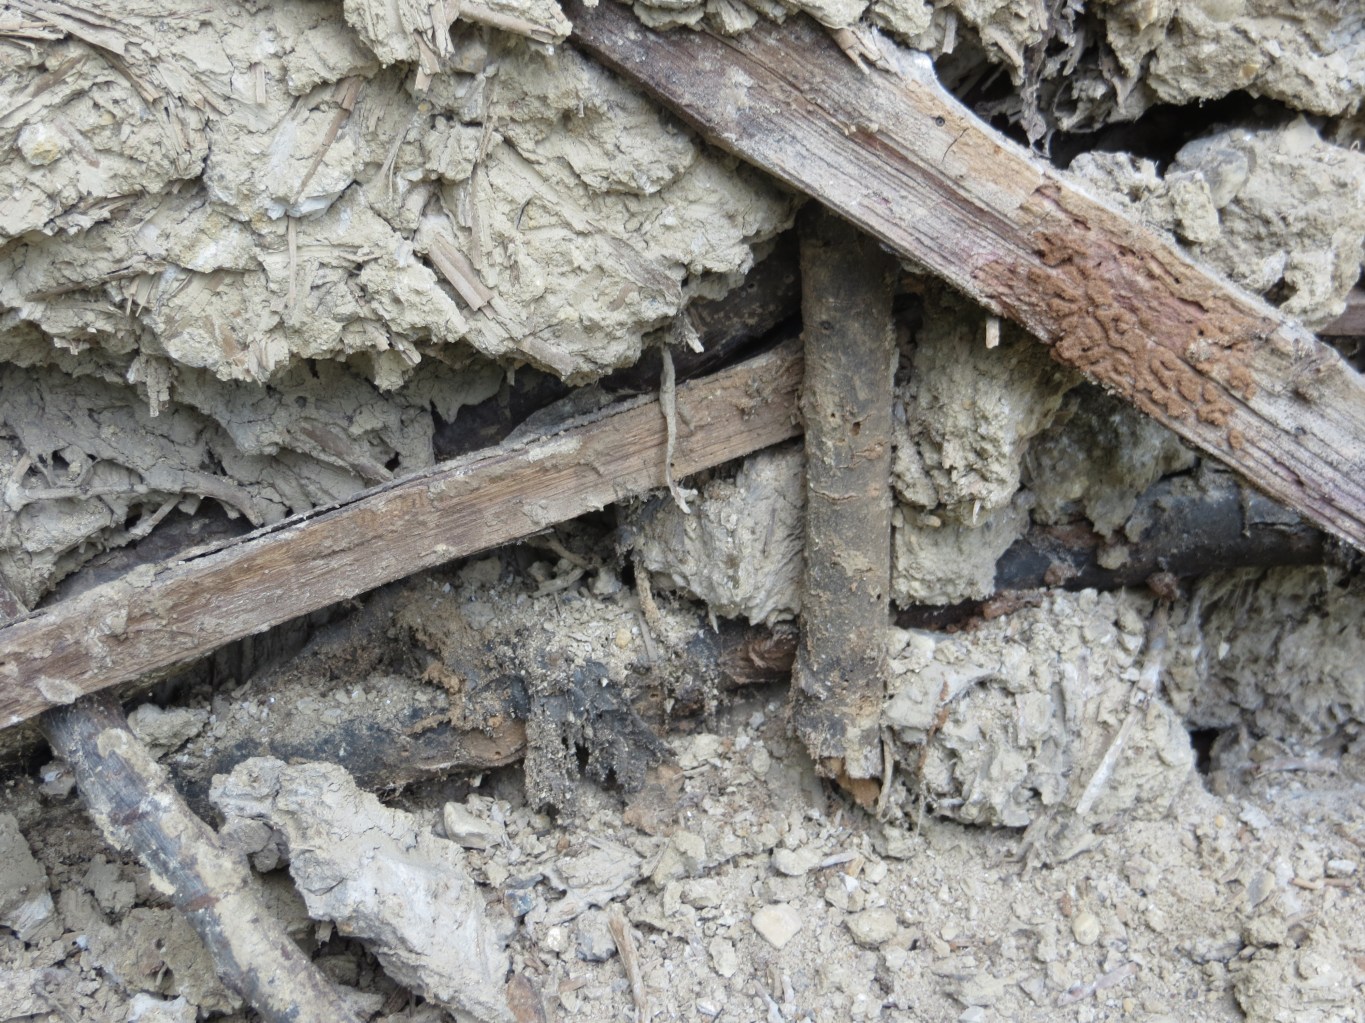
Wattle Work not Wonderful
Crude and clumsy wattling means the clay is very balley / lumpy with lots of gaps as the wattles are the opposite of smooth profile. Some nails used just to add very stout short withies with no bend in them on top adding to the depth and difficulty of daubing smoothly. Of course the daub can be broken up and re-used but I would say most of the withies are dried out beyond re bending so hazel rods will be needed in the spring. Additional daub from the garden of course.
Season View
While we have time to fix the structure the calendar is tight to almost impossible for getting tahts done and then doing the daub and the render before the end September after which many recommend not applying render as too cold and damp … the structure clearly needs repair it wont stand on it own and this is a grey ‘ish area in the Listed Building Consent protocol. A repair does not need permission … but the decision re some of the timbers being too slender for use and therefore setting them aside (for example) might be considered applying modern standards instead of maintaining like for like … its seems like supplementing rather than replacing the olde stuff that

Heritage View?
It seems like supplementing rather than replacing the olde stuff that’s not completely ‘gone’ must be a reasonable approach?
It also seems necessary to deconstruct the wall in order to be able to move the posts back into original/vertical/non leaning position .. and then reassemble it reusing as many of the current parts as possible (most of which seem relatively modern – many of the timbers are clearly machine sawn and planed in comparison with the wall plate which still carries tree bark). The daub can be wetted and reused pretty easily. A percentage of the wattles however will be too dry and rigid to reuse.
Repair Phase 2 – Repaired Wall Structure
It took the builder about 3 weeks to complete the structural repairs / rebuild after removing, and putting to one side for re-use, the wattle and daub infills. A new sole plate 6’x8′ was placed and the decayed studs (5 out of 7) replaced with new – all air dried oak. The steel ties added to hold together the back and front wall plates to prevent any further roof spread sit neatly between the 1st floor joists. The engineer who specified the repair (fm CG Robertson) has visited and commended the builders work.
Boxed in for weather protection and security.

The new posts and braces

A substantial sole plate 6’x8′ on the original plinth.
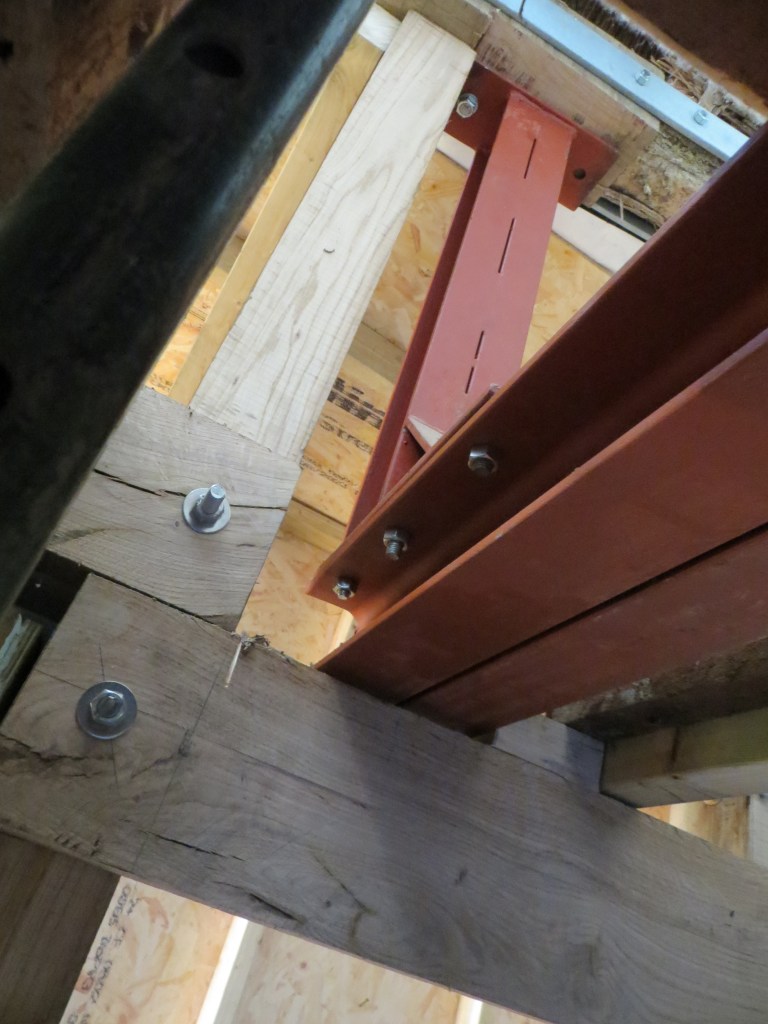
Close up of one of the two steel tie beams that hold front and back wall plate together to prevent roofspread

Temp and Olde Front Door
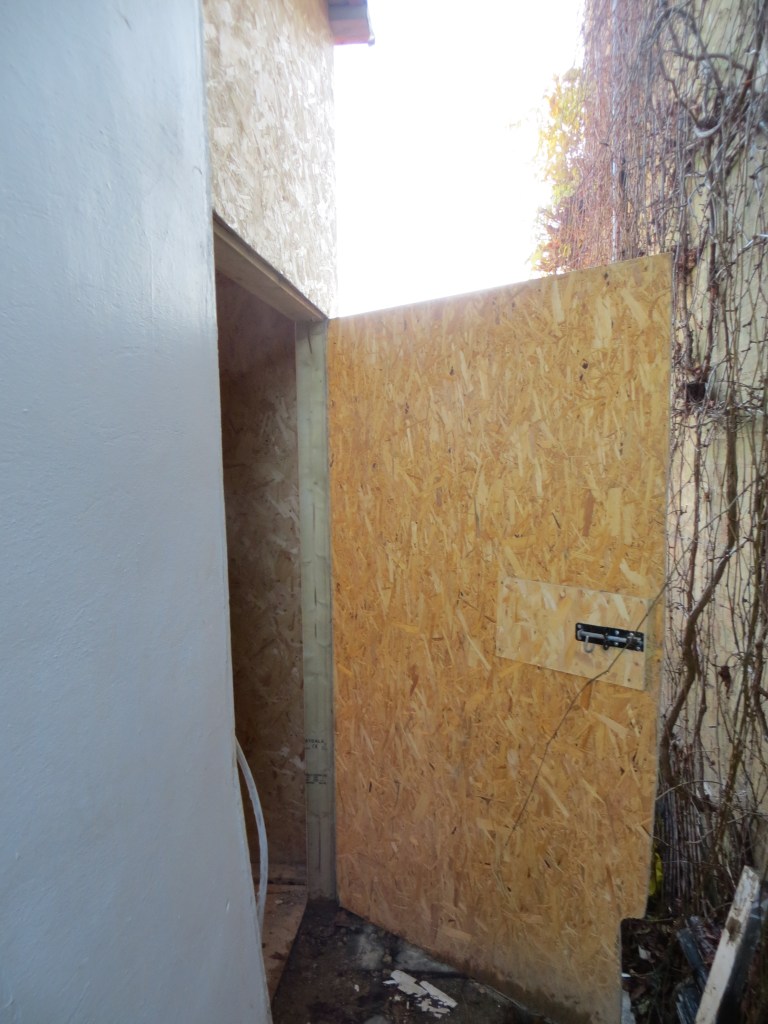
Temp side door
Repair Phase 3 – Rebuild Infills, Plaster Tidy Up
With the structural work finished in November we no have to wait until warmer weather before we can re-use the daub / re create the infills. Daub (‘mud’) needs a constant 15 degrees temp over a 4 to 8 week period to fully dry out and you can’t apply plaster or other finishes to it before that.
(We knew this delay might happen and wanted to avoid but getting builders, engineers and planning/listed permissions all on the same schedule for the structural work to be done in spring proved impossible, so we had to take an as-soon-as poss approach. You can use artificial heat if you can enclose the space and the lockable shelter with roof that the builder put on the cottage would enable this, but the cost / risk of drying too rapidly and cracking and having to be there all the time with heat appliances running, make this an unattractive option from our POV. )
And there is plenty to get on with – we can replace the floor tiles (currently laminate, add the ceiling back in (tongue and groove in natural wood colours rather than white as before) and replace units and benches in the kitchen as well as getting the workshop in the garden tidied up … you are never sort of work in these olde buildings !
